For the professional portrait photographer speed without sacrificing quality is of the essence. One area where many photographers slow down is on post processing. This is because many do not have a suitable system in place for getting high quality results at speed. I have a number of systems depending on how I need the finished shot to look and of course depending upon the desired final quality of the image. In this tutorial I am going to take you through some quick steps using plug-ins to get high end results at high speed.
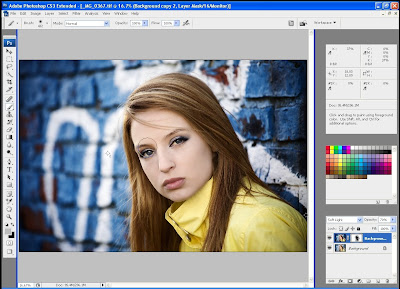
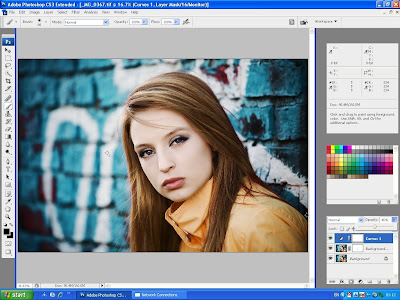
In the image below you can see we have opened up our processed raw file into CS3. This image has had very little raw processing and was just batched on some safe settings.
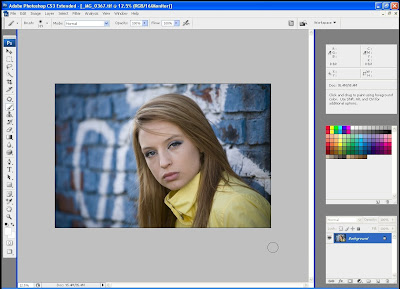
This was a natural light image taken using just a reflector at the end of a 70-200mm Canon lens.
The first port of call is to set the black and white points (I am assuming you have some knowledge of this in this tutorial). Once that has been done you will see an instant improvement in the tone and contrast of the shot as can be seen below.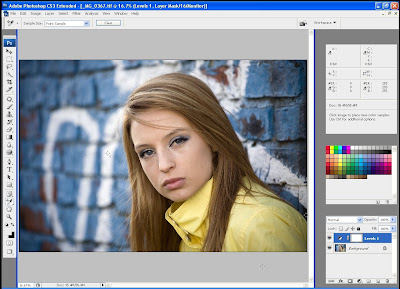
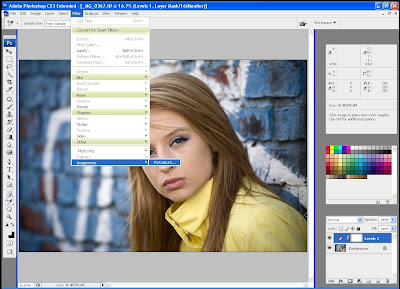
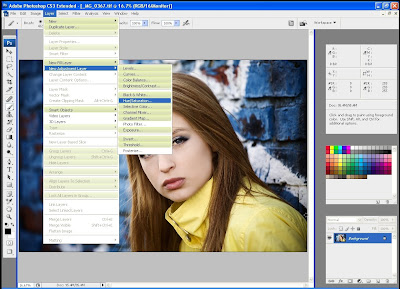
For the purposes of this tutorial I am going to be using the Portraiture 2 plug-in from imagenomic available at http://www.imagenomic.com/. Once installed the software will be available in your filters menu in CS3 and can be accessed through this menu as can be seen below.
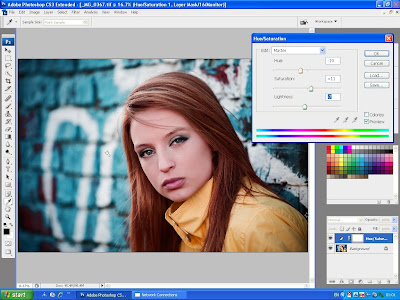
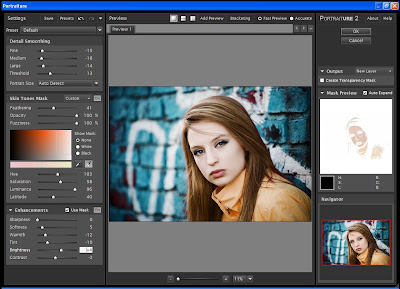
Once the plug-in has opened you will have access to the control panel for Portraiture 2. At first this can seem a little daunting however it is a very easy but powerful interface to get to grips with. One of the main benefits of this system is that it incorporates a quick mask solution allowing you to apply the effects only to the skin tones in the image, leaving all the other sections unaffected.
The dashboard is shown in the image below.
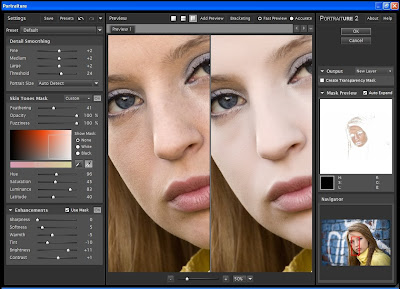
The detail smoothing controls the way in which blemishes are handled. You can see the selected mask to the right on the white background. The skin tones are selected from the skin tones mask section on the left using the eyedropper tools. The controls below allow you to fine tune your selection. Below that palette is the enhancement palette. This is where the majority of your tuning will take place, adjusting softness, warmth, brightness etc to give you a finished look. In the example above you can see the split screen view allowing you to see the original on the left and the preview of the effects on the right. The bottom right hand corner of the screen is the navigator which allows you to select which section of the image you want to view. Here we are viewing a Canon 5D file at 50%.
One you are happy with the results you can drop the split screen to view a larger viewing area before finally deciding to go ahead. You can click to create the effects into a new layer in Photoshop so you can then adjust the opacity of that layer as necessary. In this example I have pushed the file a bit further than I would normally do with the intention of adjusting the opacity of using a quick layers mask if necessary to fine tune the shot.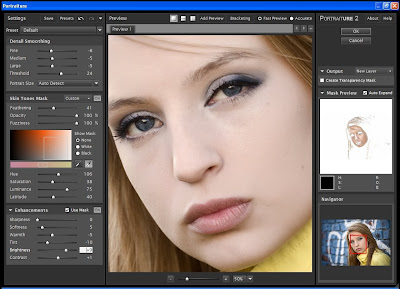
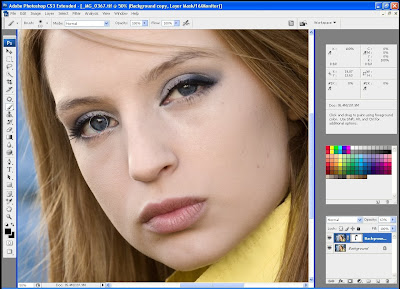
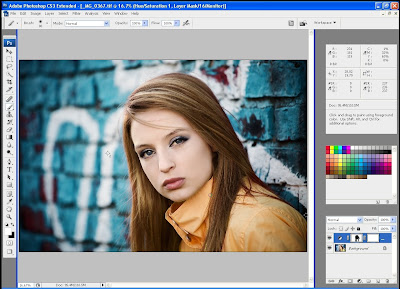
We then click OK in the top right and the image effects will be processed and will appear in a new layer in CS3 as shown below. In this example I have applied a layers mask to the Portraiture plug-in layer and have erased back the eyes and lips to ensure that none of the smoothing and skin adjusting takes place in these crucial areas. I then adjusted the opacity of the layer to the desire level.
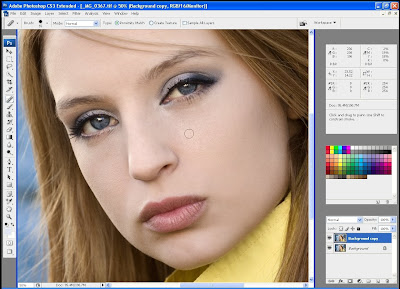
As you can see in the image above there are still a few larger skin blemishes which haven’t quite been removed. At this stage I duplicate the layer and deal with these using the Spot Healing brush. It’s a very quick job to just dab each one until the skin is improved. At the same time as doing this I make slight tweaks to any other features which need attention such as a quick saturation or dodge to the eyes. If required I may use the Clone Stamp tool on individual sections to get it right.
At this stage I could flatten the image in CS3 and make the final curves adjustment, and I would have a file with good skin tone and free of blemishes, in other words a perfectly saleable image to a portrait client. However I want to take this further and make the image more striking. To do this I am going to use another plug-in call Contrast Master, this time from Photo Wiz and available at http://www.thepluginsite.com/products/photowiz/index.htm
My aim here is to add a bit more drama into the background of the image as the blue wall is crying out for some attention and more contrast. Firstly I duplicate the layer and set the mode to 8 bit. Once again we find the contrast master plug-in under the filters menu. Once opened you will find a huge array of controls, some of which are aimed at the novice and others giving incredible controls for pro’s who really have got to grips with the software.
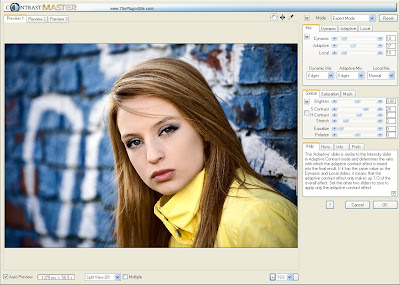
In the example shown below I have the expert mode open. This is still manageable for novices as a lot of the controls are hidden until you need them. I start by making adjustments to the shadow and highlight contrast as well as the saturation levels. I am only looking at the background at this stage as I will be using a layers mask on the adjusted layer to finish the shot in CS3. There is a preview click box in the bottom left which enables you to see the before and after effects as and when you need them.
As you can see the skin has started to look quite harsh now however as mentioned don’t worry about this as you will be erasing this section away using a layers mask back in CS3. Once you are happy with the results and they look the way you want you can click OK to apply the effects and return to CS3.
In the example below you can see that I have applied a layers mask and am using a brush to erase away the effects of Contrast Master over the areas of skin and hair.
At this stage once again I have a great shot that I am sure the client would love. For my own benefit though I want to have a look at making a couple of hue and saturation changes so I create a new adjustment layer.
I then adjust the sliders until I have reached the desired look. Once again the skin tones will have been thrown out however we can once more mask these back in using a layers mask. I love the cyan coloured background here and the slight orange tint to the jacket. The blue and yellow work really well but this shot just has the edge for me so I decide to go with it.
Once I’m happy with the settings I click OK and the layer appears in my layers palette. I then use a layers mask and work over the skin areas once more until I reveal the correct skin tones below.
Here is the result.
It’s a really good shot now and with a quick curves adjustment it could be finished. However I decide to once more harness the power of the Portraiture 2 plug-in to brighten those skin tones a touch and just give a little more separation from the background. The adjustment to the hue and saturation are just begging to have this final tweak performed.
Once more I go a little over the top so I can then reduce the opacity back in CS3 to get the finished look I want. As before I use the same controls as the first time but this time I reduce the strength of the effects as most of the work has already been done. It’s really just a final tweak now to brighten the skin against the edgy cyan background.
All that is left for me to do is to make the final curves adjustment to the file. I do this in my usual manner applying an S-Curve to the file in CS on a new adjustment layer. I use a number of points making very fine adjustments until I get exactly the look I need.
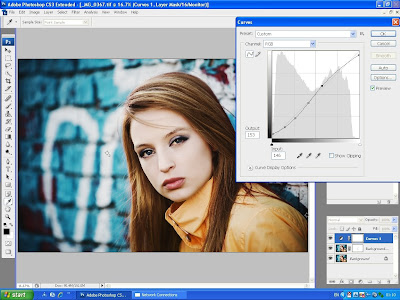
I then click OK before adjusting the opacity of the curves layer. This time settling on around 45% as this gives me the perfect finished image.
The image is then flattened and saved without sharpening. It’s a shot that will look great printed onto canvas or displayed sandwiched between acrylic in any contemporary or modern home. It might look like there were quite a few steps in this tutorial but in real time this entire retouch and process took less than 10 minutes from start to finish.
Of course you couldn’t retouch a beauty shot in the same time or using the same techniques however if you are a busy portrait professional the this is an ideal solution to giving a very high end look to your shots with the minimum input of time.


